![Diane Poremsky [Outlook MVP]](http://www.outlook-tips.net/images/2014/MVP_BlueOnly.png)
Ok. So you have the data in Outlook but need it in another program. What is the easiest way to do it? You could use File, Export and export it to one of a number of formats, which works well when you need most or all of the fields in the other program. But say you just need the name and phone number in a list or even just the email address?
In this case, just create a custom view, select one item, press Ctrl+A to Select All and Ctrl+C to Copy, then Paste it into the other program.
See Create a Custom View if you aren't sure where to begin.
For this example, I'll create a custom view in Contacts that contains only the full name and email address fields so that we can create a distribution list, as explained in Tip 201, Add Addresses to a Distribution List. You can use this method to copy data from any fields in any Outlook folder type.
Open the Define views dialogs, as explained in Create a Custom View and select any table view, then click the Copy button. Enter a name for the view – for this example, it will be named "Email only". Click OK and the Customize view dialog opens.
- Select the Fields button.
- Select the Full Name field on the right.
- Click the Move Up button to move the Full Name field to the top of the list.
- Select the other fields on the right side (hold control and move the arrow keys to select all).
- Click < – Remove to remove the other fields from the view.
- Click on Frequently Used fields in the drop down on the top left.
- Select Email fields.
- Add – > the Email field to the view
- Click Ok.

Note that you really only need the email address, but it's nice to have the full name in the DL and it doesn't affect how this works. In fact, you could just use the full name field when using this method to create a DL and let Outlook resolve the address. It also doesn't matter which field is listed first, Outlook will resolve the names and addresses correctly. When you are pasting the data in another program, you'll probably want the fields in a specific order. Use the Move Up and Move Down buttons to adjust the order.
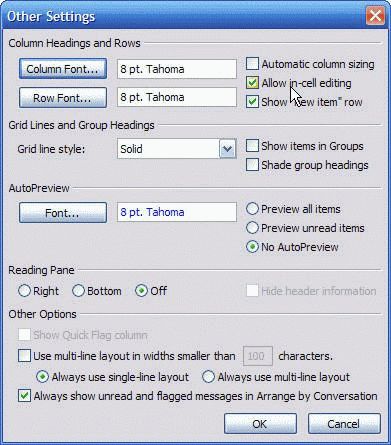
To make it easier to copy, we're going to disable in-cell editing too.
- Click on Other Settings button
- Near the top right is an option In-cell editing.
- Click it to remove the check box
- Click Ok.
If you want to filter by category or other criteria, click the Filter button and create a filter for your view. When you are finished, click Ok, then Apply View. You now have a view that contains just your contact's full name and email address.
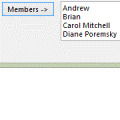
Press Ctrl+A to select all. (Click on one address to select it, if it's not already selected), then Ctrl+C to copy. Now you can paste it anywhere as a tab delimited list, like this:
 Full Name E-mail
Billy Barker bbarker@here.com
Jenny Jones jjones@jones.com
Mark Jackson mj@jackson.com
Mary Smith msmith@there.com
Create a Distribution List
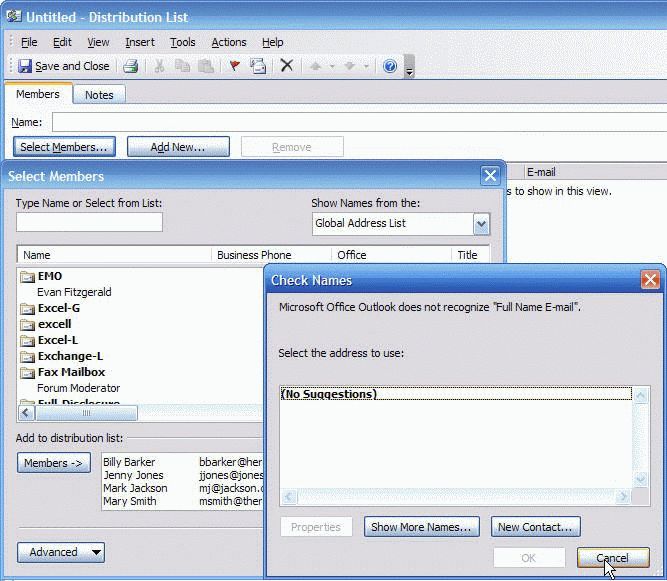
To use this list in a distribution list form as described in Tip 201, Add Addresses to a Distribution List, press Ctrl+Shift+L to open a new DL form.
- Click the Select Members button.
- Paste (Ctrl+V or right click, paste) the list into the Members field.
- Press Ok.
- Because the list includes the field names, the Check Names dialog opens.
- Click Cancel to close the Check Names dialog and return to the Select Members dialog.
- All of the entries in the Members field should be underlined as proper and resolved email address, except for the field names, Full Name Email.

- Delete "Full Name Email" from the Members list.
- Click Ok to return to the Distribution List (Contract Group) form.
- The addresses will be in listed in the DL (Contract Group) now.
- Enter a name for your DL (Contract Group) and Save it.

It's now ready to use.
You can paste the copied data (in table format) into any program that accepts pasted data, including Excel, Word, and of course, FrontPage. It's reported that you can even paste it into an Access database, although I never tried.
Note, however, that if you paste in Word or another application that is "OLE" compliant, you'll need to use Paste Special, As Unformatted Text (Edit menu in Word) or you'll end up pasting Outlook contact forms, not tabular data, as shown at the top of this screenshot.
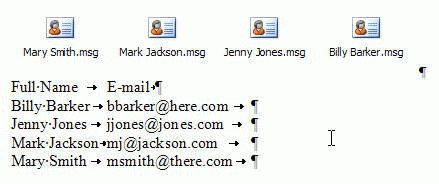
If the program doesn't have a Paste Special, As Text option, first paste the data into Notepad, then select it in Notepad and copy again. (If you need to copy and paste Outlook data very often, get Pure Text to quickly convert it to plain text, instead of using Notepad.)
Published May 13, 2011. Last updated on October 25, 2020.