![Diane Poremsky [Outlook MVP]](http://www.outlook-tips.net/images/2014/MVP_BlueOnly.png)
Microsoft Outlook has a feature called Automatic Formatting which lets you color items in a list, making them easier to see. While it's called an "automatic formatting rule" its not a Rule applied by the Rules Wizard but a feature of a View. The formatting is not applied directly to the item and will be "lost" if you move the item to a new folder or change the view. You can easily restore the colors by applying the view to the folder.
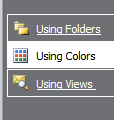
There are two ways to access Automatic Formatting: using the customize view menu or Tools, Organize, Using Colors.
Using the Organize method is quick and easy, but customizes the "current view", usually Messages. Many times, its better to create a new view.
Using Organize
Note: Organize is not available in Outlook 2010. You need to customize the view to apply Conditional formatting (new name too!)
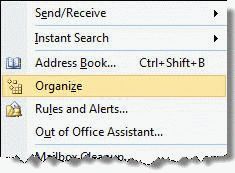
Begin by selecting Tools, Organize.
This will open the Organize pane between the toolbars and the message list / preview pane area. The options in this dialog are very limited: color messages from senders or sent to you.
Note: the Color message from rules uses the senders display name, not their email address when coloring messages. If they use different display names with one address you'll need to create a custom rule.

You can click the Automatic Formatting link in the upper right of the Organize pane to open the Automatic Formatting dialog which gives you more options for the criteria and font formatting used by the rule.
Using the Automatic Formatting dialog:
- Click the Add button to create new automatic formatting rules. This adds a new rule at the bottom of the list named Untitled.
- Type a new title in the Name field.
- Click Font to change the font, text size and/or color.
- Click Condition to set the rules. This dialog uses the same filter dialog used in Advanced Find, Search Folders, and Views.


Customize View
I recommend creating a new custom view because its too easy to lose changes made to the views. If the changes are for short term use and you won't mind if they disappear one day, then editing the current view is fine.
Open the Define Views dialog (Custom Views Organizer). This is on the Views, Arrange by (or Current view menu in some versions) menu. See Accessing the Custom View Menu if you need assistance finding the dialog.

Click New (or Copy) and enter a name for the view. Automatic formatting is very limited with some of the view types and works best with Table view. It can be used to display labels on appointments in the Day/Week/Month view, but as with all automatic formatting rules, its not permanent. You'll need to set a label on the item to make it permanent.

When you click Ok after entering a name for the View, the Customize View dialog opens. Select Automatic Formatting and follow steps 1 – 4 above to create your formatting rules.
One use of automatic formatting is shown here: List Upcoming Birthdays
To add the QueryBuilder tab, see Using QueryBuilder. The querybuilder allows you to create criteria using the OR operator, which is otherwise not supported in the filter dialog.
To create an automatic formatting rule based on an email address or domain, see
Tip 373: Filters and the From Field
Published May 15, 2011. Last updated on May 5, 2017.