![Diane Poremsky [Outlook MVP]](http://www.outlook-tips.net/images/2014/MVP_BlueOnly.png)
How do I export just the name and the email addresses from all of the contacts in a folder to a CSV file?
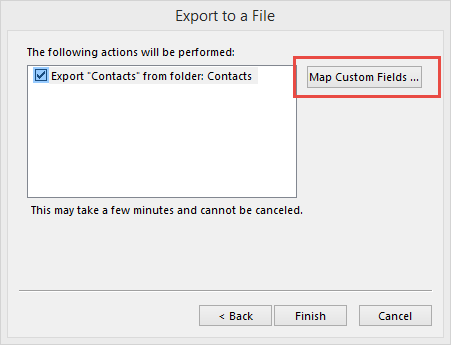
That's actually really easy to do. When you use the Import and Export wizard, you'll have an option on the last dialog to Map Custom Fields. Map Custom Fields allows you to remove any fields you don't want in the export and add just the ones you want to include in the export.
The steps for Outlook 2010 or Outlook 2013 are as follows:
- Go to File, Open & Export (Open in Outlook 2010)
- Select Import/Export (Import in Outlook 2010) to open the Wizard.
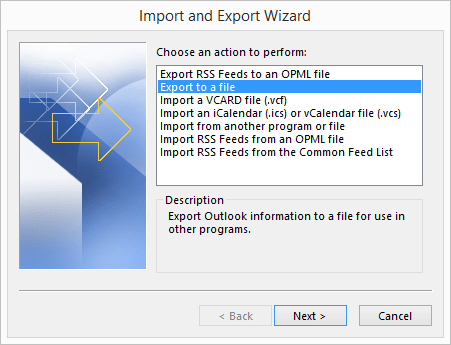
- Choose Export to a file; click Next.
- Choose Comma Separated Values as the file type; click Next
- Select the Contacts folder; click Next.
- Click Browse and type in a file name; click Next.
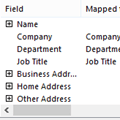
- Click Map Custom Fields button.

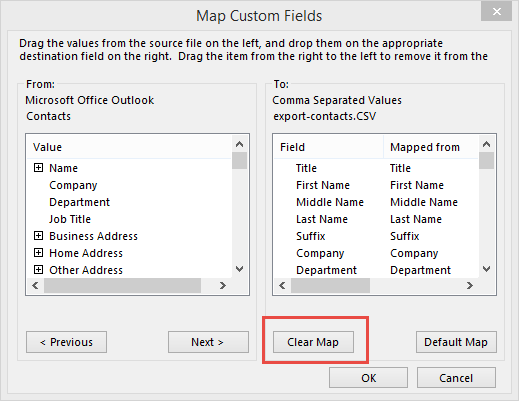
- Click Clear Map.
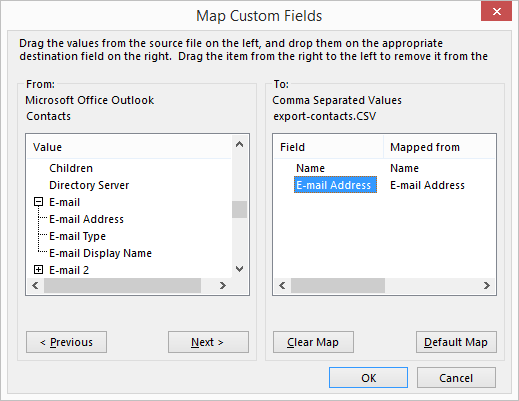
- Drag Name (or Email Display Name) from the Contacts column on the left to the CSV column in the right pane. Repeat for Email Address field.
- Click OK to return to the Export to a file page.
- Click Finish to complete the export.
Create a tab-delimited file
If you need a tab-delimited file, create a custom view with just those two fields, Select All (Ctrl+A), Copy (Ctrl+C) and Paste (Ctrl+V) into Notepad or Excel.
More information: The No-Export way to use Outlook data in Excel
Published December 7, 2014. Last updated on December 7, 2014.